Getting started with Docker
TL;DR: I describe how to get started with Docker, using it to set up a basic workflow for Python applications.
Disclaimer
I’m still a beginner in all things Docker, this is a record of my first stab at creating a working development setup on osx. Please let me know what you think in the comments below.
What is Docker?
From the official website:
Docker containers wrap a piece of software in a complete file system that contains everything needed to run: code, runtime, system tools, system libraries – anything that can be installed on a server. This guarantees that the software will always run the same, regardless of its environment.
It’s like a virtual machine, but light-weight and starts in milliseconds. Docker containers are typically more focussed and wrap just a single application. This allows Docker & tools like Docker Compose to combine these containers in useful ways.
Installation (osx)
I’ve tried to use Docker on osx in the past, and I was always less than impressed by the process. It seemed to involve virtual machines, boot2docker, custom shells.
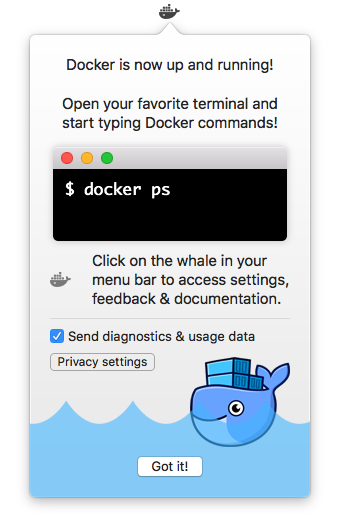
Luckily the process has been simplified significantly, just download and install the Docker app from the Docker download page and check out the Get Started with Docker for Mac guide.
Terminology
Before we proceed, let’s go through some of the terminology.
| Dockerfile | A text file containing the instructions to build a Docker image. |
| Image | The result of running your Dockerfile, a blueprint for a container,ready to be instantiated and shared. |
| Container | An instance of an image, ready to run the application we configured it to run. |
| Repository | Where images are stored so they can be easily deployed and shared. |
An Example Python application: Generating a Fibonacci Sequence
The source code for this project can be found on github.
We’ll write an Python script that accepts a --length command line argument and print out the specified number of items of the Fibonacci sequence.
# getting-started-with-docker/example1/example1.py
from itertools import islice

import click


def fibonacci_sequence():
    """
    Fibonacci sequence generator
    """
    i, j = 0, 1
    while True:
        yield i
        i, j = j, i + j


@click.command()
@click.option('--length', default=5)
def example1(length):
    """
    Simple program that prints out the Fibonacci sequence.
    """
    for i in islice(fibonacci_sequence(), length):
        click.echo('-> {}'.format(i))


if __name__ == '__main__':
    example1()
To parse the command line arguments, we use a library called Click. To use it we’ll add it to requirements.txt.
# getting-started-with-docker/example1/requirements.txt
click==6.7
Dockerfile
Now we need to create a Dockerfile. This file will describe what our image will contain and how our app wil be run.
An important first step is choosing a base image. It’s going to contain the OS and file we’re starting out with. It’s the first line in your Dockerfile, using the FROM keyword, followed by the name of the image and the tag or version.
The official Docker base images have a single-word name, like ubuntu or alpine.
For example we could choose to use the Ubuntu image. This way we can use the apt package manager to install the necessary software, like Python.
FROM ubuntu:16:04

RUN apt-get update
RUN apt-get install -y -q python-all python-pip
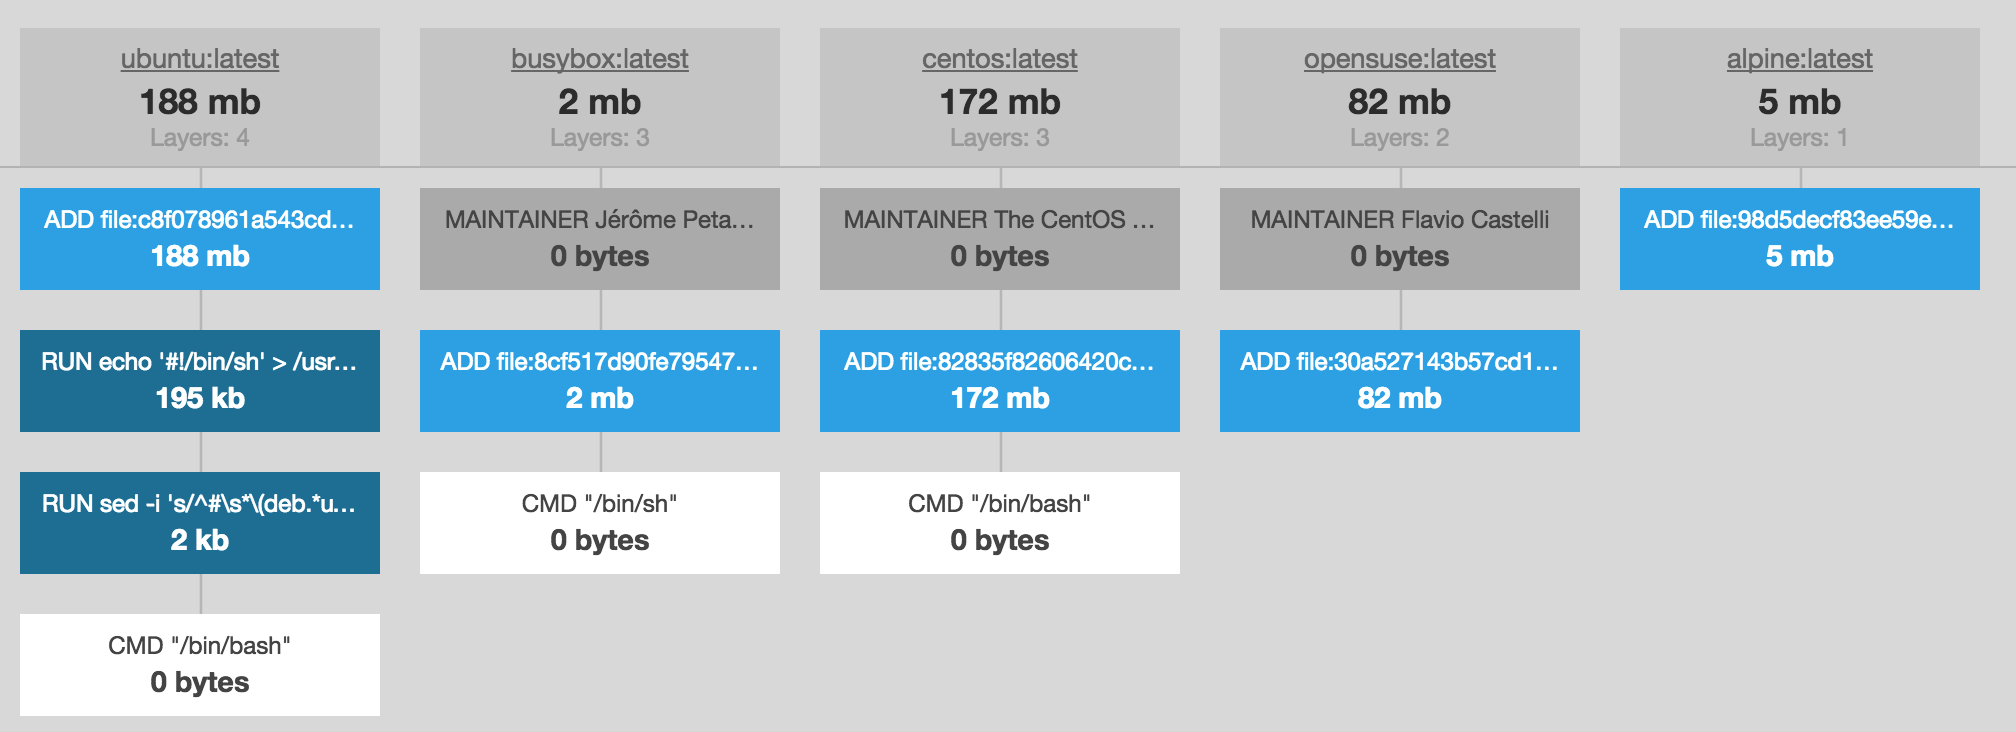
There are valid reasons for using this approach, but it means that the image will contain the full Ubuntu OS and everything that comes with it, resulting in a 180MB image. The philosophy of Docker is to have focussed, application specific containers, so you probably won’t need everything that Ubuntu will install for you.
For this reason many different kinds base images have emerged, some very minimal like Busybox or Alpine.
Even better yet, there are specialized images that come pre-installed with a specific Python version! Let’s use the Alpine Python 3.6 image for this application and finish the Dockerfile.
# getting-started-with-docker/example1/Dockerfile
FROM python:3.6-alpine

# Install python dependencies
ADD ./requirements.txt /tmp/requirements.txt
RUN pip install -r /tmp/requirements.txt

# Copy the source code to /opt/example1
ADD . /opt/example1/

# Run!
WORKDIR /opt/example1
CMD ["python", "example1.py"]
Let’s go through these lines, one-by-one:
FROM python:3.6-alpine tells Docker to base this image on the Alpine base image that comes with python 3.6 installed.
ADD ./requirements.txt /tmp/requirements.txt copies the requirements file from the host to the container’s /tmp directory.
RUN pip install -r /tmp/requirements.txt installs the requirements using pip inside the container.
ADD . /opt/example1/ copies the full contents of the host’s directory to /opt/example1/.
You might be wondering why the requirements.txt was copied & installed in a separate step instead of executing it from /opt/example1/requirements.txt after copying the full directory.
The reason for this is that Docker images are versioned and will only be rebuild when changes have been detected. So ADD ./requirements.txt /tmp/requirements.txt will only be re-executed when requirements.txt has changed, while the ADD . /opt/example1/ will be re-executed every time any file changed.
WORKDIR /opt/example1 changes the current working directory to /opt/example1/
CMD ["python", "example1.py"] finally runs the Python script using the default Python interpreter, which is Python 3.6 in this image.
Build
Now it’s time to build our first image! Open a terminal, change to the directory that contains the Dockerfile and run:
docker build --tag kenophobio/getting-started-docker-example1 ..
Docker will now pull the base image and apply the steps we defined in our Dockerfile.
We’ve now build an image called kenophobio/getting-started-docker-example1 based on the Dockerfile found in current directory (note the . in the end).
We can ask Docker to show us the images that are now available on our system by running:
docker images
Note that our base image is also in there.
~ docker images
REPOSITORY                                    TAG                 IMAGE ID            CREATED             SIZE
kenophobio/getting-started-docker-example1   latest              f6c114182e15        5 minutes ago       93.28 MB
python                                        3.6-alpine          b30df2468c80        10 days ago         88.6 MB
We can clean up these images by noting the ID and running:
docker rmi <ID>
Run
This is the moment we’ve have been waiting for, we’re going to create a container and run it using:
docker run kenophobio/getting-started-docker-example1
This should display the first 5 items of the Fibonacci sequence.
~ docker run kenophobio/getting-started-docker-example1
-> 0
-> 1
-> 1
-> 2
-> 3
Docker has created a container from our image and ran it. We can ask Docker to list our containers using:
docker ps --all
We need to add the --all flag because by default we’ll only see running containers and our application exits after displaying the Fibonacci sequence.
Note that every consecutive run will create a new container and assign a random name to it:
~ docker ps --all
CONTAINER ID        IMAGE                                         COMMAND                CREATED             STATUS                     PORTS               NAMES
02092c5ee1b0        kenophobio/getting-started-docker-example1   "python example1.py"   3 minutes ago       Exited (0) 3 minutes ago                       compassionate_nobel
c880e7bf233d        kenophobio/getting-started-docker-example1   "python example1.py"   3 minutes ago       Exited (0) 3 minutes ago                       evil_heisenberg
We can clean up these containers by noting the CONTAINER ID and running:
docker rm <CONTAINER ID>
Running the container with the --rm flag will automatically remove the container after it exits.
When we execute the run command, Docker will execute the CMD ["python", "example1.py"] we’ve defined in our Dockerfile, but we can override this by passing the command from the command line directly:
docker run kenophobio/getting-started-docker-example1 python example1.py --length 10
~ docker run kenophobio/getting-started-docker-example1 python example1.py --length 10
-> 0
-> 1
-> 1
-> 2
-> 3
-> 5
-> 8
-> 13
-> 21
-> 34
Making changes to the source code will not automatically propagate those to the existing image and containers. You will first have to rebuild it. Depending on the nature of the changes you will notice the rebuild is a lot faster, since it only executes the steps that have been affected by the change.
docker build --tag kenophobio/getting-started-docker-example1 .
Sending build context to Docker daemon 4.096 kB
Step 1 : FROM python:3.6-alpine
 ---> b30df2468c80
Step 2 : ADD ./requirements.txt /tmp/requirements.txt
 ---> Using cache
 ---> 33df26661003
Step 3 : RUN pip install -r /tmp/requirements.txt
 ---> Using cache
 ---> 61a1113f8e45
Step 4 : ADD . /opt/example1/
 ---> 4d2f8713ae60
Removing intermediate container 84133ea943b9
Step 5 : WORKDIR /opt/example1
 ---> Running in 2d9f7de38514
 ---> d3c90f66a869
Removing intermediate container 2d9f7de38514
Step 6 : CMD python example1.py
 ---> Running in b6b62fe8525d
 ---> ffb9c28a6126
Removing intermediate container b6b62fe8525d
Successfully built ffb9c28a6126
➜  example1 git:(master) ✗ docker run kenophobio/getting-started-docker-example1
--> 0
--> 1
--> 1
--> 2
--> 3
Interactive shell
Since we can execute arbitrary commands within our container, we can also launch a shell and attach a terminal to it. To do this we need to tell Docker that we want an interactive shell by providing the flags --interactive --tty and executing the /bin/sh command within the container.
docker run --interactive --tty kenophobio/getting-started-docker-example1 /bin/sh
~ docker run --interactive --tty kenophobio/getting-started-docker-example1 /bin/sh
/opt/example1 # ls
Dockerfile        example1.py       requirements.txt
/opt/example1 #
This is useful for debugging and inspecting the runtime environment of the container.
Make
To wrap things up, I’ve included a make file with some common Docker tasks.
# getting-started-with-docker/example1/makefile
PROJECT=getting-started-docker-example1
TAG=kenophobio/$(PROJECT)


docker-build:
	docker build --tag $(TAG) .

docker-run:
	make docker-build
	docker run --rm --name $(PROJECT) $(TAG)

docker-shell:
	docker run --rm --interactive --tty $(TAG) /bin/sh
This allows us to run commands like:
make docker-build
or
make docker-shell
This is it?
So far it may seem to be nothing else than a more complicated way of achieving what a virtual environment could do, but Docker can do a lot more than this.
Next time I hope to dive into Docker Compose to orchestrate multiple containers together.
The source code for this project can be found on github.
I hope this helps you to get started with integrating Docker into your workflow. Let me know what you think in the comments below.